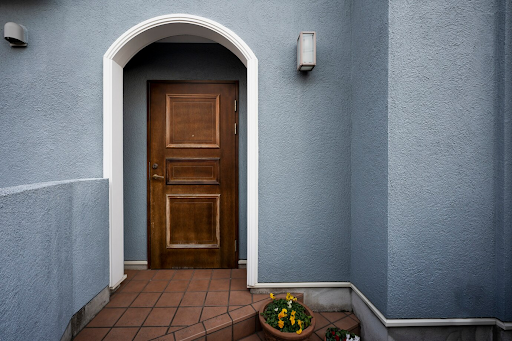
A Step-by-Step Guide to Entry Door Installation: DIY vs. Professional Help
Installing a new entry door can be one of the most impactful home improvement projects you can take on. Not only does it change the look of your home, but it also enhances security and improves energy efficiency. Whether you choose to go the DIY route or hire a professional for entry door installation, the process requires careful planning, precision, and the right tools. In this guide, we’ll walk you through the step-by-step process of installing an entry door and discuss the benefits of both DIY and professional installation.
Contents [show]
Step-by-Step Guide to Entry Door Installation
Step 1: Gather Tools and Materials
Before starting your entry door installation, it’s crucial to gather all the necessary tools and materials. Here’s a basic list of what you will need:
- Measuring tape
- Level
- Drill and screwdriver
- Hammer
- Utility knife
- Saw
- Shims
- Caulk and weatherproof sealant
- Insulation foam
- Screws and nails
Step 2: Measure the Door Frame
Accurate measurements are crucial for a smooth and effective entry door installation. Begin by measuring the width, height, and depth of your existing door opening. Ensure you measure at different points, as door frames may not always be perfectly square.
Once you have the measurements, compare them with the dimensions of your new entry door. If the new door is slightly larger than the current opening, you’ll need to trim the frame, which will require precision to avoid damaging the surrounding area.
Step 3: Remove the Old Door
- Remove hardware: Begin by removing the old doorknob, deadbolt, and any other hardware from the door.
- Unscrew the door hinges: With the help of a drill or screwdriver, unscrew the hinges that hold the door in place.
- Take off trim and molding: Using a crowbar or a pry bar, gently remove the trim around the door. Be careful not to damage the surrounding wall, as you may want to reuse the trim later.
- Remove the door frame (if necessary): If you are replacing the entire frame, carefully cut and remove the old frame. This may involve using a saw or hammer to loosen any nails or screws.
Step 4: Prepare the Opening
Before installing the new door, ensure the opening is clean and level. Inspect the subfloor and the frame to check for any water damage or structural issues. If you find any damage, it’s best to repair it before moving forward with the entry door installation.
Next, apply a waterproof membrane or flashing tape to the bottom of the door frame to prevent moisture from seeping in. This is especially important if you live in an area prone to heavy rain or humidity.
Step 5: Position the New Door
Once the opening is ready, it’s time to position your new entry door. Carefully lift the door and place it in the opening, ensuring it’s evenly spaced on both sides. Use shims to adjust the position of the door and ensure it’s plumb (vertically straight) and level (horizontally aligned).
Make sure the door is properly aligned before securing it in place. You want it to fit snugly, but without being so tight that it doesn’t open and close smoothly.
Step 6: Secure the Door Frame
Once the door is positioned correctly, it’s time to secure it in place. Using screws or nails, fasten the door frame to the surrounding wall. Make sure to drive the screws or nails deep enough so they hold the frame securely but don’t go so far that they damage the frame itself.
Double-check the door’s alignment after securing it. Open and close the door a few times to ensure it operates smoothly.
Step 7: Seal and Insulate
To ensure your new door is energy-efficient and weatherproof, you need to seal any gaps between the door frame and the wall. This is where caulk and weatherproof sealant come in. Apply a generous bead of caulk around the perimeter of the door, making sure to fill any gaps.
Next, use insulation foam to fill any larger gaps. This will prevent drafts and help keep your home warmer in the winter and cooler in the summer. Once you’ve sealed the gaps, trim away any excess foam or caulk for a clean finish.
Step 8: Install the Hardware
With the door securely installed and sealed, it’s time to install the door hardware. Begin by attaching the doorknob, deadbolt, and any other security features. Follow the manufacturer’s instructions for placement, and ensure the hardware is positioned properly for smooth operation.
Test the door several times to make sure it opens and closes effortlessly and locks securely. You may need to adjust the hardware slightly to achieve the best fit.
DIY vs. Professional Installation: Which is Best?
DIY Entry Door Installation
If you have the time, tools, and experience, DIY entry door installation can be a rewarding project. You’ll save on labor costs, and you’ll have full control over the process. The key to success is ensuring precise measurements, a proper fit, and a secure installation.
If you’re unsure about your skills or the complexity of your door frame, it might be wise to seek advice or assistance from a professional.
Professional Entry Door Installation
Professional installation guarantees a high-quality finish. Experts have the knowledge and experience to handle tricky situations, such as uneven door frames or difficult installations. Professionals can also offer warranties on their work, which provides peace of mind that your entry door installation is done right the first time.
Hiring a professional can save you time, ensuring the job is completed quickly and correctly.
Conclusion
Whether you choose DIY or professional installation for your entry door, one thing is clear: the quality of your materials plays a vital role in the door’s performance. High-quality door and window supplies not only contribute to a secure and efficient installation but also enhance your home’s overall aesthetics and energy efficiency.
